
The base was sculpted from standard grade milliput. All texture was made with crumpled-up aluminum foil.


While milliput was still soft I pinned Baldur's feet, and inserted him into the base to mark his footing.
Once milliput was rock hard (I just gave it 24 hours) it was primed with black gesso


The gesso is not dry yet in this photos, so it looks pretty glossy :)
While gesso was drying, i mixed up four different shades of grey. Colors used were chaos black and codex grey (or lamp black and slate grey, or how ever you want to call them) in ratios 4:1 2:1 1:1 and 1:2

These shades were progressively drybrushed on the milliput rock


I gave the rock some time to dry, and mixed up some more paints, first one is pure slate grey, and then slate grey:titanium white (or codex grey/skull white) in ratios 2:1 1:1 and 1:2

All the new shades were progressively drubrushed as well (in the end i didnt use the lightest color)

The next step was ti give the whole rock a liberal wash of light sepia (ogryn flesh equivalent). I just used a home-made wash. Main reason for light sepia wash is that no real rock is monochrome and it just makes it look a lot better.

Last step was a drybrush of very pale brown color (or bleached bone)

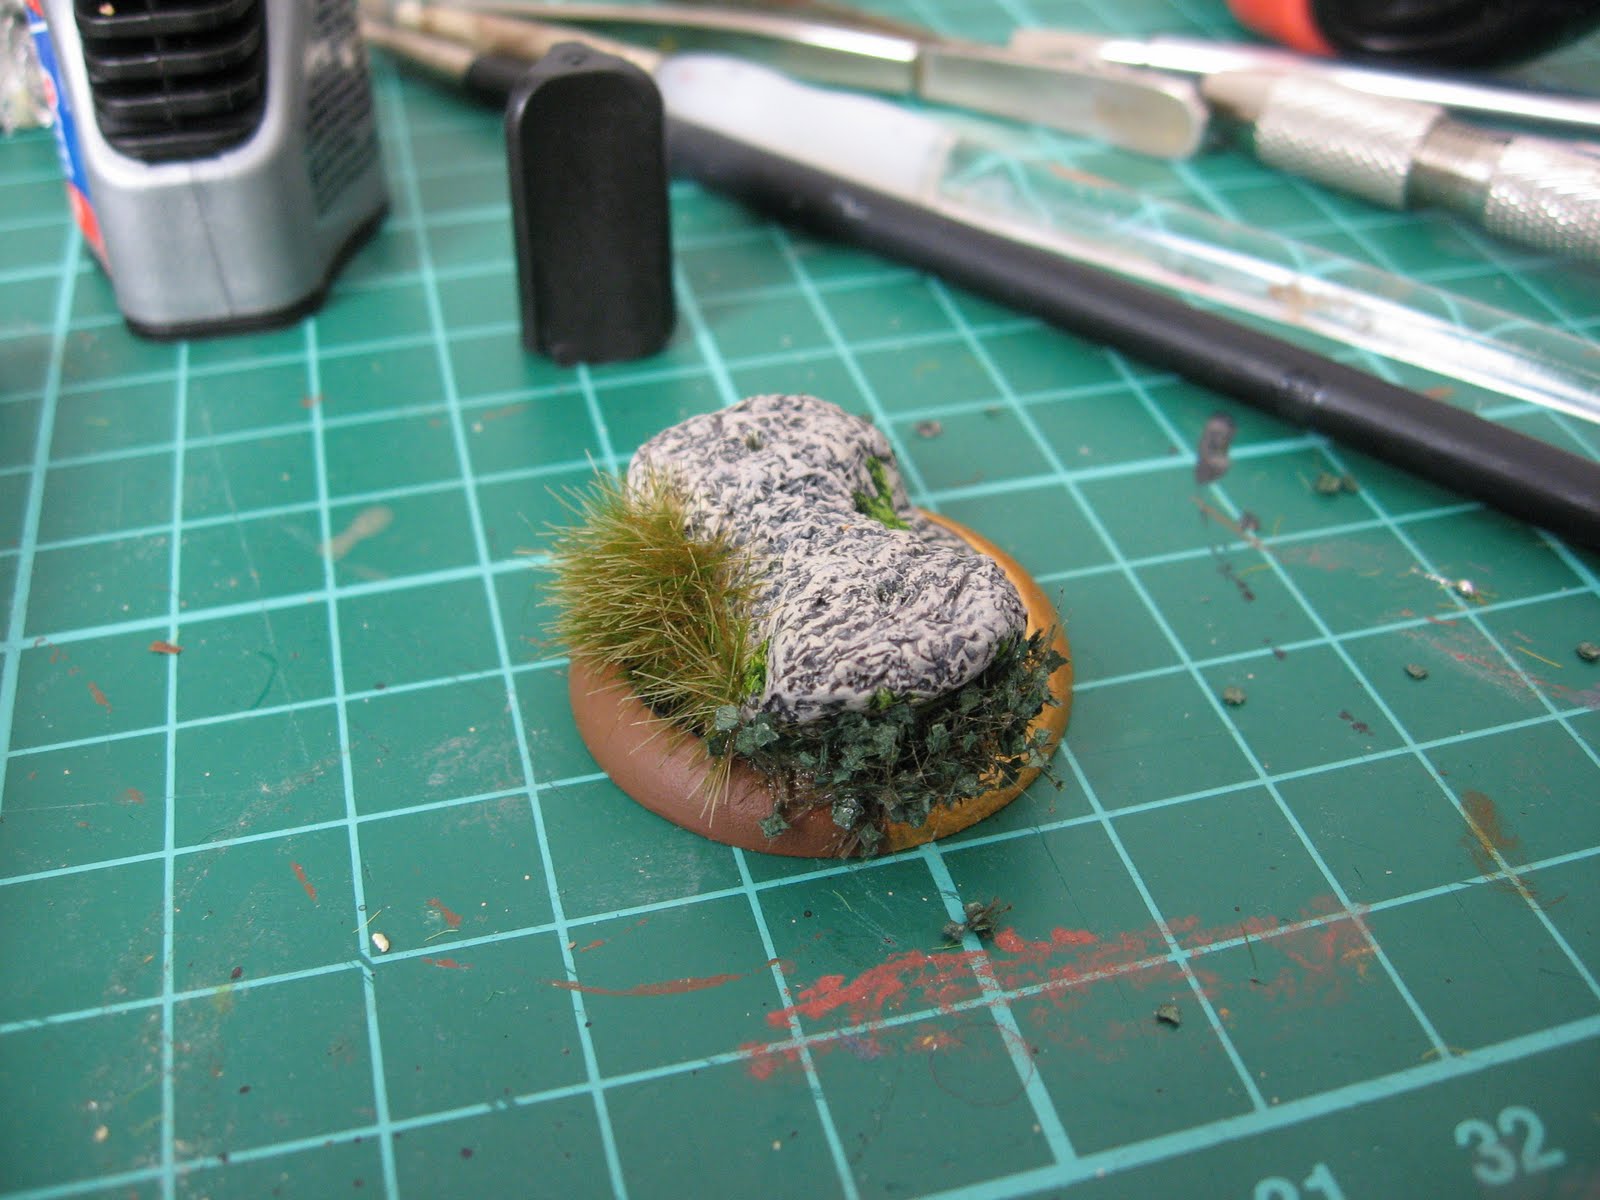
Final touches were done with a mixture of green and yellow ink, Army Painter poison ivy, and Army Painter swamp tuft. The ink was used to accent grassy areas. The base was painted in calthan brown (like all the bases i have for this army) and the front arc was accented in glorious gold (vallejo one)


And here is the big man himself standing on his base

And for the very end here is the recipe for the home-made-wash I use. This recipe is floating around the interwebs, and I dont take any credit for it.
1. Mix distilled water and liquitex flow release in 10:1 ratio
2. Mix the previous concoction with liquitex mate medium in 1:1 ratio
3. Add waterproof acrylic ink to your liking. For 10ml of the mix I like to add 50 drops of ink.
To make stronger color, accent it with black ink (browns and reds only since it looks ugly with blues and greens)
If you liked this tutorial feel free to leave a comment :)
Nice one, I may have to try that!
ReplyDelete